

Active VS passive stretching – which type of stretching is better? The short answer is “both.” Here, I reveal 23 active and passive stretches – including videos of towel stretches and passive yoga floor stretches – that have garnered excellent results for many people.
I encourage you to try these stretches to see if they help you feel better, move better, look better, and stand better.
Why Physical Therapists Provide Active and Passive Stretching
There is a good reason that when you visit a physical therapist, the therapist spends time taking you through both passive and active stretching movements.
Limitations in overall mobility cause many muscular and joint injuries, and active stretching and passive stretching are significant parts of the solution.
Physical therapy has made advancements in recent years. It used to be that if:
- you observed tightness in a specific area, you would stretch it;
- if you noticed weakness in a specific area, you would strengthen it.
But these old-fashioned interventions don’t always solve the overall problem.
Often, it’s more helpful to analyze how you execute fundamental movement patterns and then try to pinpoint what areas are causing imperfect movement.

Today, if you visit a physical therapist, he or she will likely first observe you while you do basic movement patterns such as walking, squatting, or a forward bend:
- The therapist then tries to identify which movement patterns give you the most trouble or appear the least aligned and the least healthy.
- The therapist attempts to determine the specific culprits sponsoring discomfort or restricting your basic movement patterns.
For instance. you might think squatting is awkward because your hip flexors are stiff. Yes, it might be your hip flexors, but it might also be your calves, your hamstring muscles, or that one of your abductors is tighter than the other.
One of the easiest ways to improve your health – and take years off of your appearance – is to improve your joint mobility, alignment, posture, and muscular flexibility.
You might not need a physical therapist to accomplish this.
You can assess your own areas of restriction and then experiment with active and passive stretching to see if it helps make your movement patterns better.
Identifying Problem Areas in Your Mobility
What tissues are holding you back from achieving optimal form?
One of my favorite ways to determine how I’m moving on a particular day is to use my phone to do a vertical video of myself squatting for a few repetitions from 3 different angles:
- video of me squatting from a behind perspective;
- video of me squatting from the side;
- video of me squatting, facing the camera.
I suggest you try this, too. In playing the videos back, you can look closely at your form:
- does one hip tilt to the left or right as you approach the bottom of your squat?
- how low in the squat can you go?
- do you slouch forward during the squat?
- do your feet turn way out as you squat?
- does the body weight distribution in your feet roll to one side?
While watching the video of yourself, if you recognize less-than-stellar form, you know that today’s training needs to include some active stretching and passive stretching!
No anti-aging strategy is complete if it doesn’t also create supple joints, flexible muscles, and a beautifully aligned spine.
A good, customized mobility routine will not only prevent future injury but – over time – will also resolve pain and optimize your athletic performance at the gym or in any sports you play – including golf, tennis, and soccer.
Of course, you should proceed cautiously. Though stretching tight areas can be uncomfortable, it shouldn’t be extremely painful. When stretching:
- discomfort can be productive;
- but extreme pain is always wrong and to be avoided;
- I also encourage you to consult your medical doctor to get the all-clear before beginning any significant changes to how you move or how you eat.
Active VS Passive Stretching: What Is the Difference?
Therapists and fitness trainers tend to use the terms active stretching and passive stretching differently (there’s some disagreement among professionals about how to define these terms), but to keep things simple, in this article:
- active stretching means contracting the muscle fibers of a specific area – agonist – while stretching the opposing area – antagonist – without using external force;
- passive stretching means using a prop or partner to help you with a specific stretch while you do your best to relax the rest of your body.
I suggest using a combination of both active and passive stretches to help you get the most from your mobility session. What follows are stretches you can try. I like to do most of my stretching at the end of my workout when my body is heated and limber.
You might find it helpful to use the timer on your phone to make sure you’re holding a stretch long enough:
- beginners can hold stretches for 1 minute;
- intermediates can hold a stretch for 90 seconds;
- advanced-level athletes can hold a stretch for 2 minutes.
Using a Towel as a Prop: Towel Stretches for a Flexible Body
Have you ever tried towel exercises?
Stretches can be done using a simple hand towel to help you become more firm and flexible.
Using props during a workout can often be helpful.
My favorite exercise props are hand towels, rectangular blocks, and split-roller blocks. Sometimes, before a stretching session, I like to dim the overhead lights and light a candle to help set a more serene and focused mood. And because these stretches involve big movements, I like to wear comfortable microfiber clothing.
People with a genetic propensity for flexibility – usually young people who are super bendy – don’t need props.
But for those of us over the age of 50, we sometimes get stiff – and a block helps by bringing the floor closer to our bodies, or a towel helps by extending the length of our arms or legs.
Try These Towel Exercises
These seven exercises will help your body become stronger and more supple.
The Danda
The Sanskrit name for this towel exercise is Dandayamana Janushirasana, also called Standing Head to Knee Pose. It stretches the hamstring of the elevated leg while developing strength in the supporting leg. It also enhances balance and core development. Place the towel around the foot of your elevated leg and hold the pose for 1 minute. If you’re super bendy, you can do it without a towel and just use your hands on your feet instead.
The Pike
The pike uses a towel underneath the balls of your feet. Facing the floor in a plank position, you then pull your feet toward your face, bending at the waist.
The towel helps to create a sliding effect along the floor during the pike movement. Initiate the movement from the contraction of your lower abdominal plate located above your pubic bone and below your navel. Exhale at the point of maximum exertion. I try not to let my shoulders travel forward beyond my fingers to protect my wrists.
Behind-the-Back Tricep Stretch
It’s the subtleties of this towel exercise that make it so effective. Avoid arching your back. Keep your pelvis centered. Keep your shoulders pressed down away from your ears. Knees are slightly soft. Slowly use the towel to move your top hand down closer to your bottom hand as you climb your bottom hand up toward your top hand. Meanwhile, keep pressing the top elbow back, back, back behind your head.
Locust
Again, if you’re young and bendy, you can probably reach your hands behind your back and interlace your fingers. But if you’re over 50 (particularly if you happen to be a man with muscular development in his torso), the towel will help you reach a full extension so that you can open up those tight shoulders and pectorals. I encourage you to keep mating your pelvis into the floor while doing this towel exercise so that your back doesn’t over-arch.
Floor Hamstring Stretch
If you sit on the floor with your legs out in front of you, you can probably reach out with your hands and grab your feet, mainly if you round your back and rest your face on your knees. However, it can be interesting to do this stretch while keeping your head up, chest out, and back tall. And for that variation, you might a towel helpful.
Bridge
You don’t need a towel to do a simple bridge posture. However, a towel can be very helpful if you want to roll those shoulders back underneath you – so that you get a deep stretch in your pecs and deltoids. Hold this pose for a full minute while breathing slowly, and you’ll also improve your posture and firm your glutes.
Bent Over Pose
In yoga, this is called a Standing Separate Leg Stretching Posture. You just separate your legs wide and then bend over at the waist. Keep your legs straight if you want a deep stretch in your hamstrings.
But the real genius of this posture is how it improves the mobility of your anterior deltoids (an area that can otherwise get a bit slouchy). Maybe you can interlace your fingers behind your back; if so, that’s great. But for the rest of us mere mortals, a towel helps make the stretch possible.
Because this short workout contains a lot of backbends, be sure to finish up your session by entering gently into a 1-minute prayer pose, followed by a 2-minute Shavasana (“corpse” pose).
Use Common Sense during Towel Exercises
Whenever I attempt a new workout or maneuver, I intend to proceed cautiously with slow movement, mindful breathing, and impeccable technique. This helps to reduce the risk of injury and downtime.
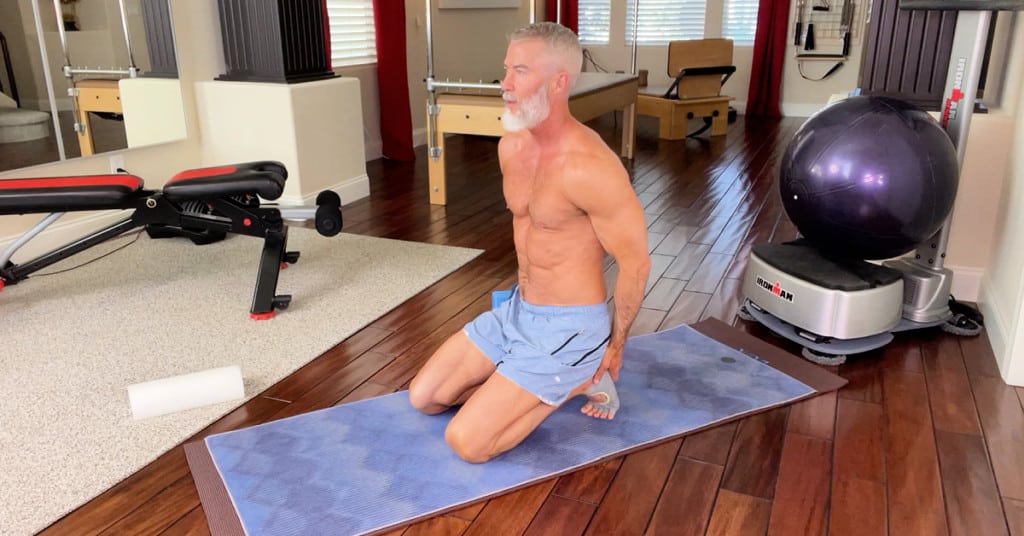
Try This Highly Effective Series of Floor Stretches
Your mobility movements form the foundation of your weekly exercise program. A once-a-week yoga session that includes active and passive stretching is a relatively simple, organized, and proven way to meet those mobility needs.
And I’m not the only one who thinks so.
People have been doing yoga for thousands of years precisely because it’s so effective for keeping the human body young and strong.
The Sequence of Stretching Matters
Stretching comes in two additional styles – ballistic and static:
- Ballistic stretches are done near the beginning of a workout to help lubricate your joints – where two or more bones meet to allow movement – and prepare your body for what’s to come. They are done gently but somewhat quickly to raise your body temperature (in an earlier article, I revealed yoga’s fundamental, standing ballistic movements).
- Static stretches are done near the end of a workout when you are thoroughly limber and ready to hold stretches for several minutes each (today’s article reveals yoga’s fundamental static floor stretches).
Static stretching involves lengthening a muscle to the point of discomfort and then holding that position for a period of time. Ballistic stretching involves continuous movements at the end range of motion where the muscle is at maximal length.
– Journal of Strength & Conditioning research
Sequencing in yoga is structured so that earlier postures in the series prepare you for other postures that come later. Often, a pose is followed immediately by a counterpose. For example, a backbend is followed by a forward bend. This helps create muscular balance and helps to reduce the risk of injury.
Yoga-based floor stretches can be a highly effective part of a well-rounded fitness program. Give these a try.
Sequence of Yoga-Based Floor Stretches
Follow this sequence, holding stretches for a minimum of 3 minutes each (the exception to this would be the vinyasa flow when you move a bit more quickly between upward dog and downward dog):
- Thread the Needle
- Isometric Abdominal Contraction
- Bridge
- Prayer (“child’s pose”)
- Cobra
- Vinyasa Flow (Upward Dog / Downward Dog)
- Embryo
- Locust
- Bow
- Camel 1 and Camel 2
- Sleeping Hero (use blocks if needed)
- Prayer Revisited
- Scoop and Vacuum
- (Downward Dog into) Proud Pigeon into Full Pigeon
- Rabbit
- Seated Spinal Twist
- Cobbler
- Shavasana.
Yoga’s Stretching Origins
Historical evidence of yoga’s existence can be seen as far back as 2700 B.C. when Sanskrit was the language of ancient Northern India.
Yoga blossomed and developed even more fully between 500 B.C. and 800 A.D.
During this classical period, the process of yoga was established as beginning with the physique, then the breath, the mind, and the inner self.
And it continues in that tradition even today.
These stretches that benefit the body are identified as postures called “asanas.”
Sometimes the modern names used for asanas are interchangeable with the Sanskrit names. For example, someone might say “corpse pose,” or they might say “Shavasana.”

Precautions for Active Stretching and Passive Stretching
On one hand, a sedentary lifestyle can lead to profoundly poor health. On the other hand, you don’t want to take on too many challenges too quickly.
A bit of exertion and discomfort might be appropriate because the very nature of exercise means to explore the edges of your physical limitations; however, remain mindful about avoiding injury.
Do not stretch to the point of pain. Both forward bends and backward bends should be entered respectfully.
It’s sometimes tempting to hold your breath during a stretch, but I encourage you to continue breathing deeply and slowly – especially during the most awkward stretch moments.
Conclusion: Don’t Skip Your Stretching!
When life gets busy and the available time for exercise is limited, it’s tempting to skip your active and passive stretches.
However, to reach your fitness goals, progress, and reduce the risk of injury, you must continue developing your mobility.
Mobility means having supple joints and flexible muscles. To say that it’s essential would be a masterpiece of understatement. It’s an integral part of reducing your risk of accelerated aging.
Are Your Joints Acting Up?
I would be wrong to leave you thinking that active and passive stretching will single-handedly solve all of your joint issues. The truth is that if your joints are feeling tender or stiff – whether it’s your shoulders, elbows, lower back, hips, or knees – what will most likely help them feel fantastic again is an advanced-level anti-inflammatory diet. It’s life-changing.
An anti-inflammatory diet and a strategic active and passive stretching program would likely be your best solution for healthier joints and muscles.
Additional Sources on Active VS Passive Stretching:
Becoming a Supple Leopard by Dr. Kelly Starrett – available at bookstores
Movement by Gray Cook – available at bookstores
India’s History of Yoga – https://mea.gov.in/in-focus-article.htm 25096/Yoga+Its+Origin+History+and+Development
The 6 Pillars of Modo Yoga (note from Dane: Modo Yoga is my favorite style of yoga; I encourage you to visit a Modo Yoga studio if you’re fortunate enough to have one near you) – https://modoyoga.com/how-is-modo-yoga-different-than-other-styles-of-yoga-the-6-pillars-of-modo-yoga/
Established Research on Medical Yoga Therapy – https://www.ncbi.nlm.nih.gov/pmc/articles/PMC5332914/
Effects of Different Types of Stretching – https://journals.lww.com/nsca-jscr/fulltext/2016/11000/acute_effects_of_static_vs__ballistic_stretching.31.aspx